Posted by Ash Moosa
Taking a good photograph is just the first step in the product photography process. Pretty often, when photographing small products, the photograph is larger than life size. For example, a ring is about an inch wide, but the picture can be five to ten times as big as that. When viewing products at this magnitude, all the minor scratches, blemishes, reflections, etc. suddenly become visible and make your product look bad. That’s when photo editing and retouching becomes important.
Photoshop is the most widely used editing tool in the world. While the full version of Photoshop may be intimidating at first, their starter version Photoshop Elements is also very powerful. Here are three powerful techniques in Elements that you can use with ease to improve your product photos.
Each of these tools has a bunch of different options. This post gives you the basic uses of these tools. To dig in deeper, take a look at some YouTube videos illustrating these in more detail.
Tool #1: Spot Healing Brush:
This tool is probably one of the most frequently used editing tools in product photography. With one click you can replace a blemish, scratch, lint, dust etc. with the same color and texture as the area surrounding it.
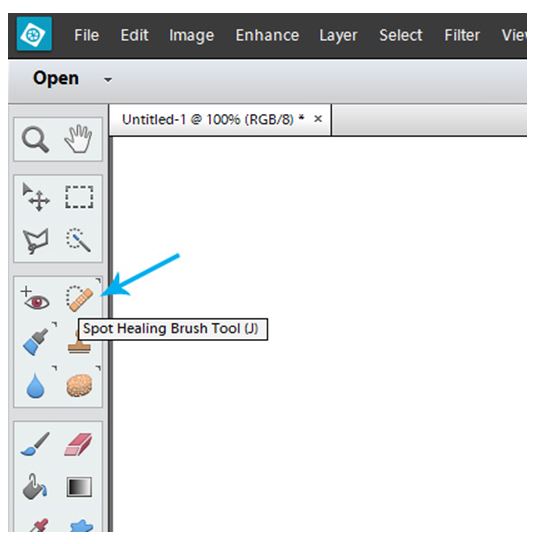
This screenshot shows you where to find the tool. This is from Photoshop Elements version 12. The newer version is likely very similar.
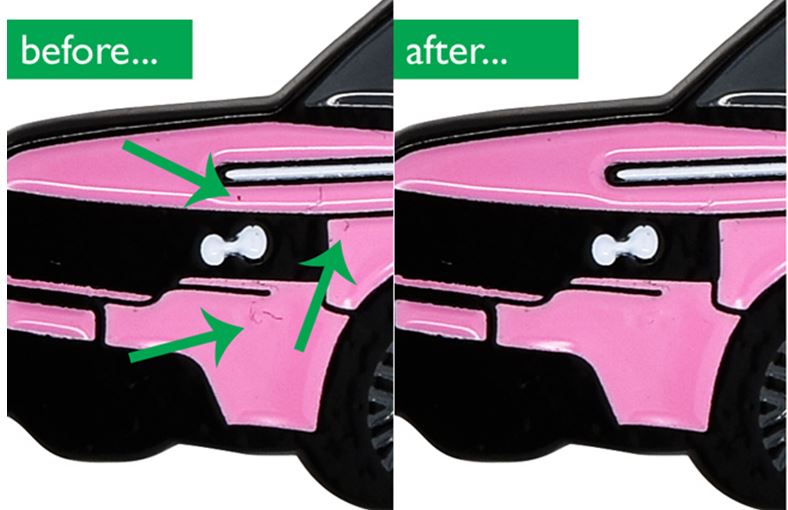
To see how this works, look at this image of a small car. When zoomed in, notice the black spots in the left image. By using the spot healing brush tool, when you click and drag on each spot, the color is replaced with the color immediately surrounding it. So within a few seconds, all the spots are replaced by the same surrounding color pink. Here is the before and after comparison.
Tool #2: Replace Color
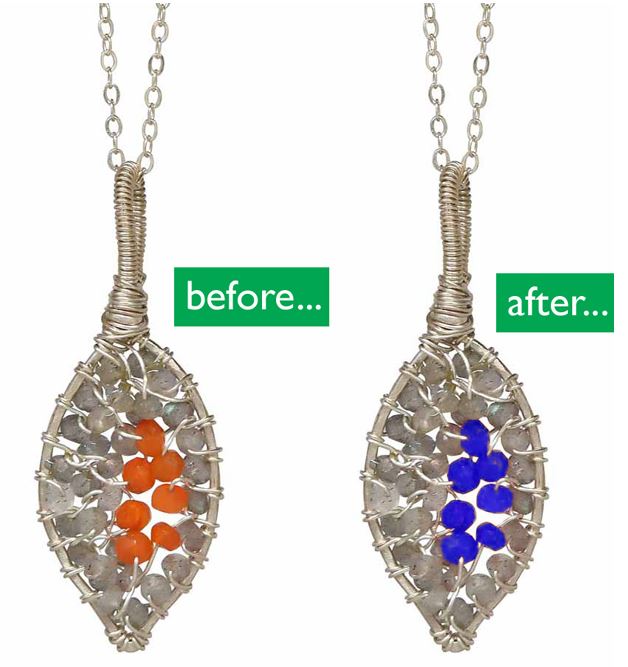
The spot healing brush is good for fixing small unwanted areas. But when you have a bigger area you want to change, the replace color tool can be helpful. For example, let’s say you have a necklace with orange beads and the exact same style with blue beads. Instead of taking two pictures, you can take one picture, do all of the editing like removing flaws with the spot healing brush, adjusting brightness, etc. and then use the replace color tool to change the orange to blue. Saves time and also gives the images consistency.
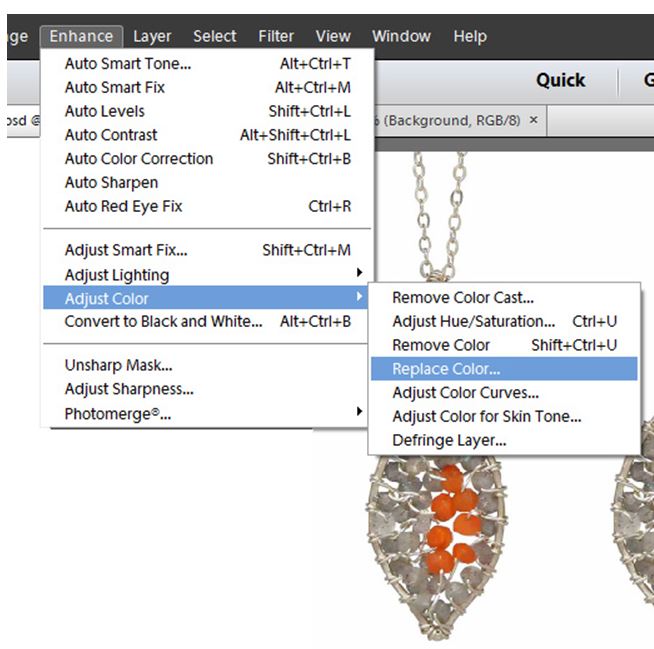
To get to this tool, go to Enhance > Adjust Color > Replace Color.
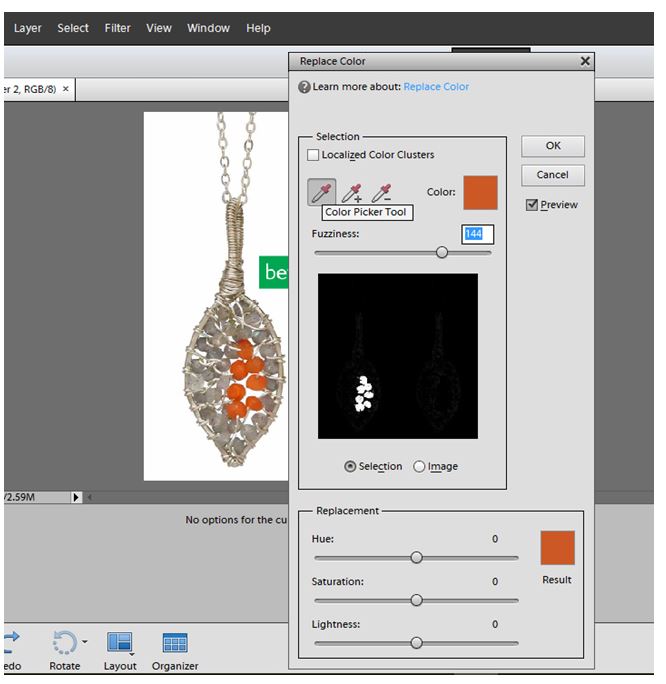
In the dialog box that appears (shown below), select the color picker tool and select click on any orange bead in the image. Then adjust the ‘fuzziness’ slider to make sure the color range includes all the different shades of orange that appear in the necklace. The goal is to get to a fuzziness level that completely selects the orange beads in the necklace without selecting anything else (illustration below).
Then use the sliders at the bottom in the ‘replacement’ section to adjust the color – or click on the square ‘result’ color box at the bottom right and select the color you want to change it to.
Tool #3: Unsharp Mask
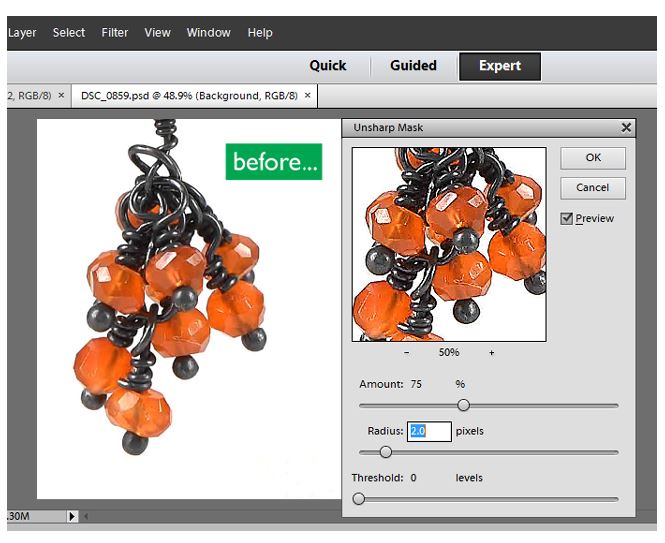
This feature is used to adjust the sharpness of the image. If you have an image that is a bit soft or not as clear as you want it to be, the unsharp mask tool will help you sharpen your image. Go to Enhance > Unsharp Mask (shown in the image under replace color) and in the dialog box, play with the ‘amount’ and ‘radius’ sliders to see the impact it has on your image. Start with 75% amount and a radius of about 2. Then move it up or down to see the impact. These settings are different for each product so you’ll have to play around with it.
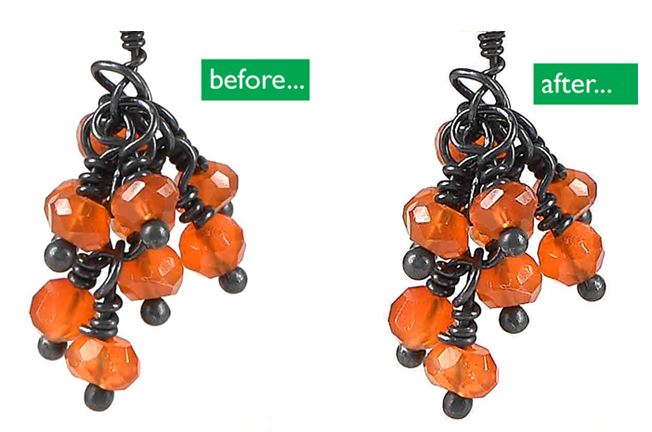
The difference in the below images is subtle but if you look carefully, you’ll see that the image on the right is a sharper image – the metal is darker and shinier, the beads are a touch brighter and the facets are more defined.
To conclude…
In Photoshop Elements (or Photoshop), you can do the same thing in many different ways. Each option has its pros and cons. The above are the tools I’ve found particularly helpful and frequently use. For more information, search for these tools on YouTube to see them in action. They are easy to use and will definitely improve your product photography efforts.
Which are your favorite editing tools and techniques? Comment and let us know.
Author bio:
Ash Moosa is a product photographer specializing in jewelry. He works with small and medium sized businesses to photograph their products for use on the web and print catalogs. If you’re looking to outsource your photography project, view details on his site at jewelryshoot.com. Mention this post and get your first 3 images free.

